Salesforce Marketing Cloud is a leading digital marketing tool that helps you manage your marketing campaigns more efficiently and effectively. One of the most important features of Marketing Cloud is the ability to create and manage data extensions to optimize the segmentation and personalization of marketing campaigns.
In this article, I will explain how to create a filtered data extension in Salesforce Marketing Cloud from scratch to improve the segmentation of your email marketing campaigns.
Step 1: Create a “Filtered Data Extension”
To get started, you must create a “Filtered Data Extension” in Marketing Cloud. A “Filtered Data Extension” allows you to filter your audience data from the beginning, without the need to create a filter in the original Data Extension.
To create a “Filtered Data Extension”, select “Create” in the “Data Extensions” section, and then select “Filtered Data Extension”. Next, select a “Source Data Extension” (the original Data Extension that will be filtered) and create the filter.
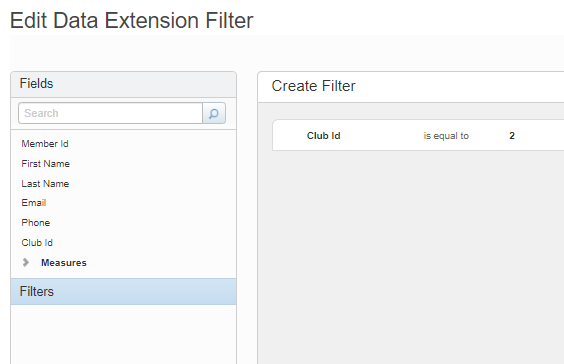
The process to create a filter is: select the “Filter” tab at the top of the page and define the filter criteria.
Once you have created the filter, a filtered Data Extension will automatically be generated. You can use this filtered Data Extension to send your marketing campaigns directly, without the need to create a filter in the original Data Extension.
Once you have created the filter, a filtered Data Extension will automatically be generated. You can use this filtered Data Extension to send your marketing campaigns directly, without the need to create a filter in the original Data Extension.
Step 2: Verify and Save the Filter as a Data Filter
Once you have added your filter, make sure to verify that the results of your filter are what you expect. Finally, save your filter by clicking on the “Save as Filter” button at the bottom left of the page.

Creating a “Filtered Data Extension” from scratch in Salesforce Marketing Cloud is an excellent way to segment and personalize your email marketing campaigns more efficiently. With this feature, you can significantly improve the effectiveness of your email marketing campaigns and increase your return on investment.
One of the advantages of the filtered Data Extension is that it can be automated to update regularly with data that meets the filtering criteria you have defined. This means you don’t have to worry about manually updating your filtered Data Extension, which allows you to save time and resources.
Next, I will explain how you can automate a filtered Data Extension in Salesforce Marketing Cloud.

Step 3: Create an Activity
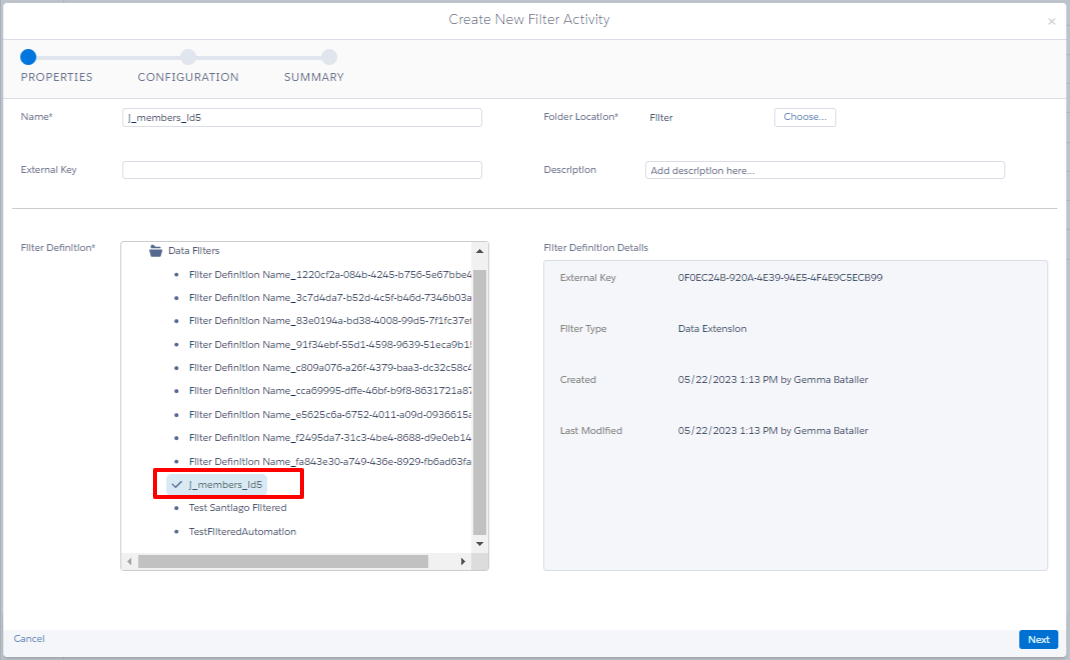
Before automating your filtered Data Extension, you must create an activity of the “Filter” type, which will later be step 1 of the automation. We have seen this in point 2 of the previous step.
Once you have defined your filtering criteria, you must create an “Automation” to automate the process of updating your filtered Data Extension. To do this, you must go to “Automation Studio” and create an activity from the filter performed.
Step 4: Set Up the Automation
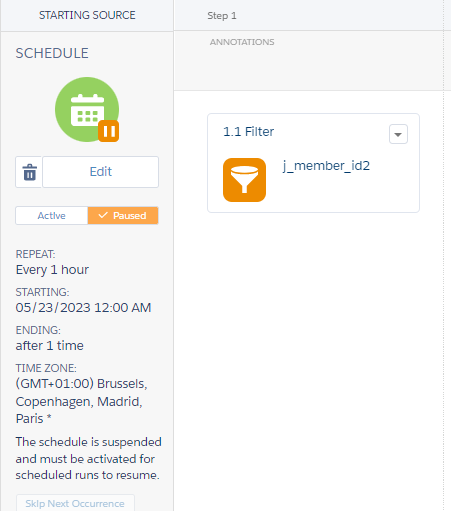
In the Automations section, select “Create Automation” and as a trigger or start resource we put “Scheduled Automation”. Then, set the frequency with which you want your filtered Data Extension to be updated, for example, every week or every month. Next, select the filtered Data Extension that you want to update and link it to a filtering activity.
Step 5: Execute the Automation
Once you have set up your Automation, you can schedule it to run automatically according to the frequency you have defined. This means that your filtered Data Extension will automatically update with the data that meets the filtering criteria you have established, without the need for you to manually intervene in the process.
We’ve got it! Automating a filtered Data Extension in Salesforce Marketing Cloud allows you to save time and resources by automatically updating the data that meets the filtering criteria you have defined. This makes it easier for you to send personalized messages tailored to the needs and preferences of your customers, which can significantly improve the effectiveness of your marketing campaigns.
Anyway, you will surely see it much clearer if you visualize how to do it in this video (in spanish).
We hope you find this helpful!
If you liked this article, you might also be interested in: